A comprehensive guide for submitting Make-Your-Own (MYO) characters!
Table of contents
Submitting MYOs
MYOs stand for "Make Your Own" which is when you submit your own idea and design for a character to play with in the ARPG. You must first purchase or earn a MYO Ticket before you make your own character.
Getting a MYO Slot
You may purchase a MYO ticket with gildes, Bepotelkh's In-Game Currency. The tickets are avaialble in the Gilde Shop under the "World" tab on the top navigation menu. The MYO tickets are available in the General Shop. You may also purchase a MYO ticket with USD through Herboreal's store. They are available at the USD shop link under the "World" tab on the top navigation menu.
Designing Your MYO
Please visit our Design Guide for in depth information on how to design your character. You may design your MYO yourself or have someone else design it for you. If you have another person create the design and art for you make sure to credit them when uploading your character (more info follows). If you have questions while designing your character feel free to join our Discord and mods will answer your questions. Please be sure to make your MYO on a transparent background for the masterlist.
Submitting Your Design
QUICK IMPORTANT NOTES
- Make sure your file is BELOW 2000x2000px or the site will break
- Make sure your file is a transparent PNG meaning no background
- Your art should not have more than 1 view of the character unless it's a chimera
- Your art should not have a written name, color palette, etc on it. This is not a reference gallery; it's a masterlist record. You can link your toyhouse on the character profile page once the design is approved.
Before submitting your design you must buy your MYO ticket and then use it to create a MYO SLOT in your name. To find your MYO Ticket in your inventory go to the front page and scroll down to "Inventory"
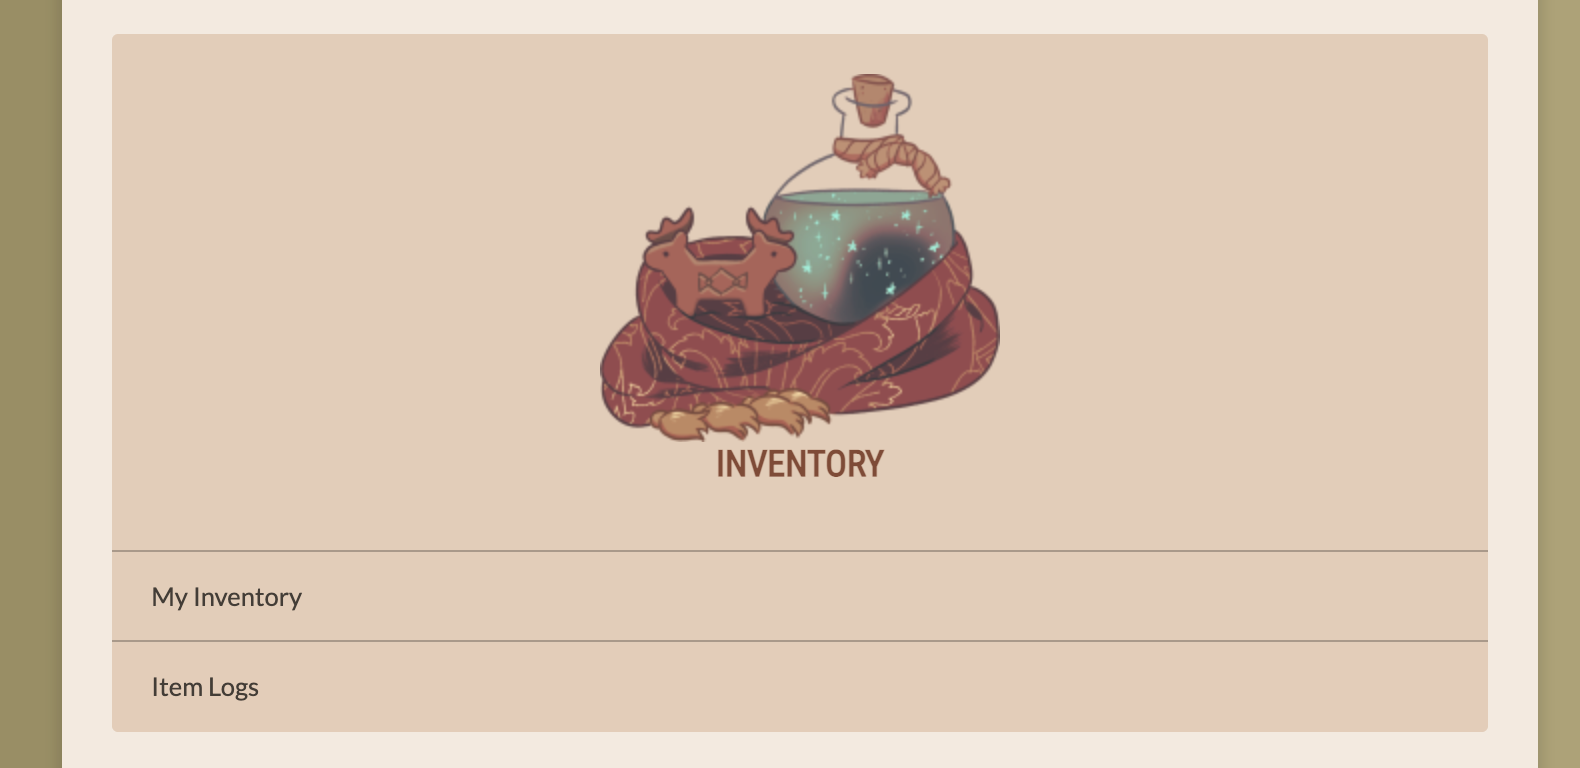
From there scroll down to your character creation items
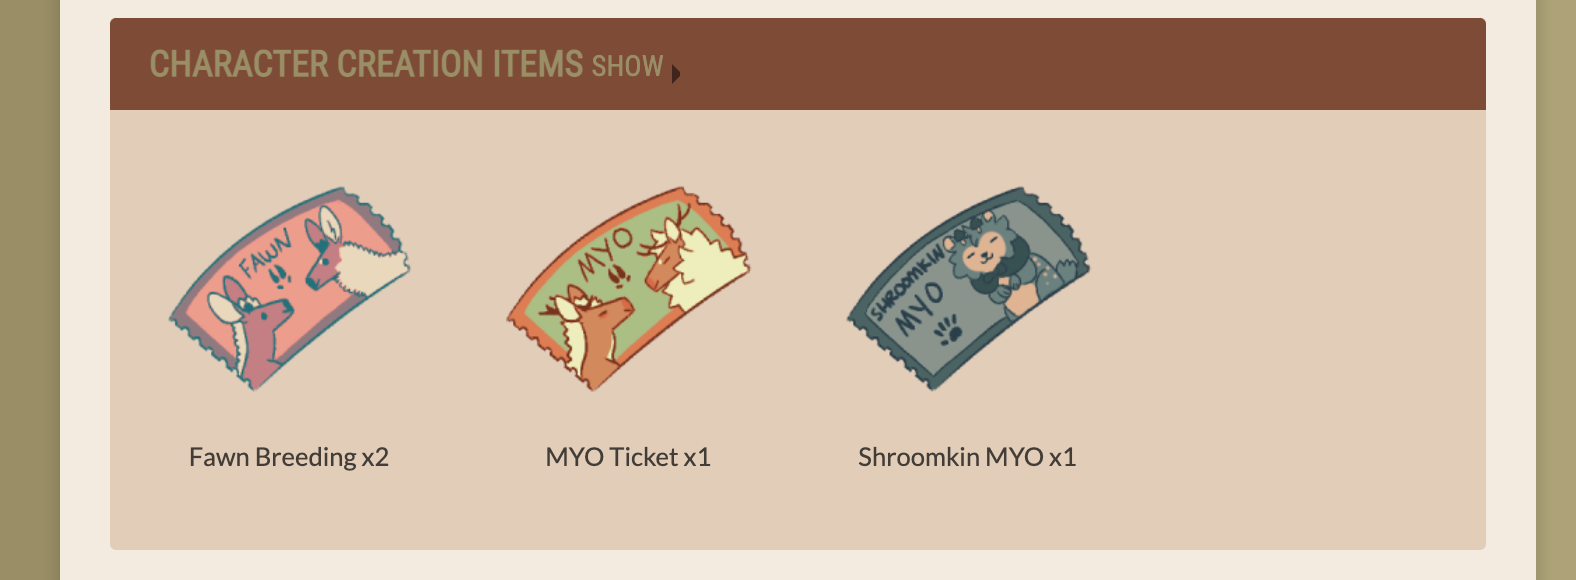
Click the Myo Ticket to get to the Myo Ticket Page
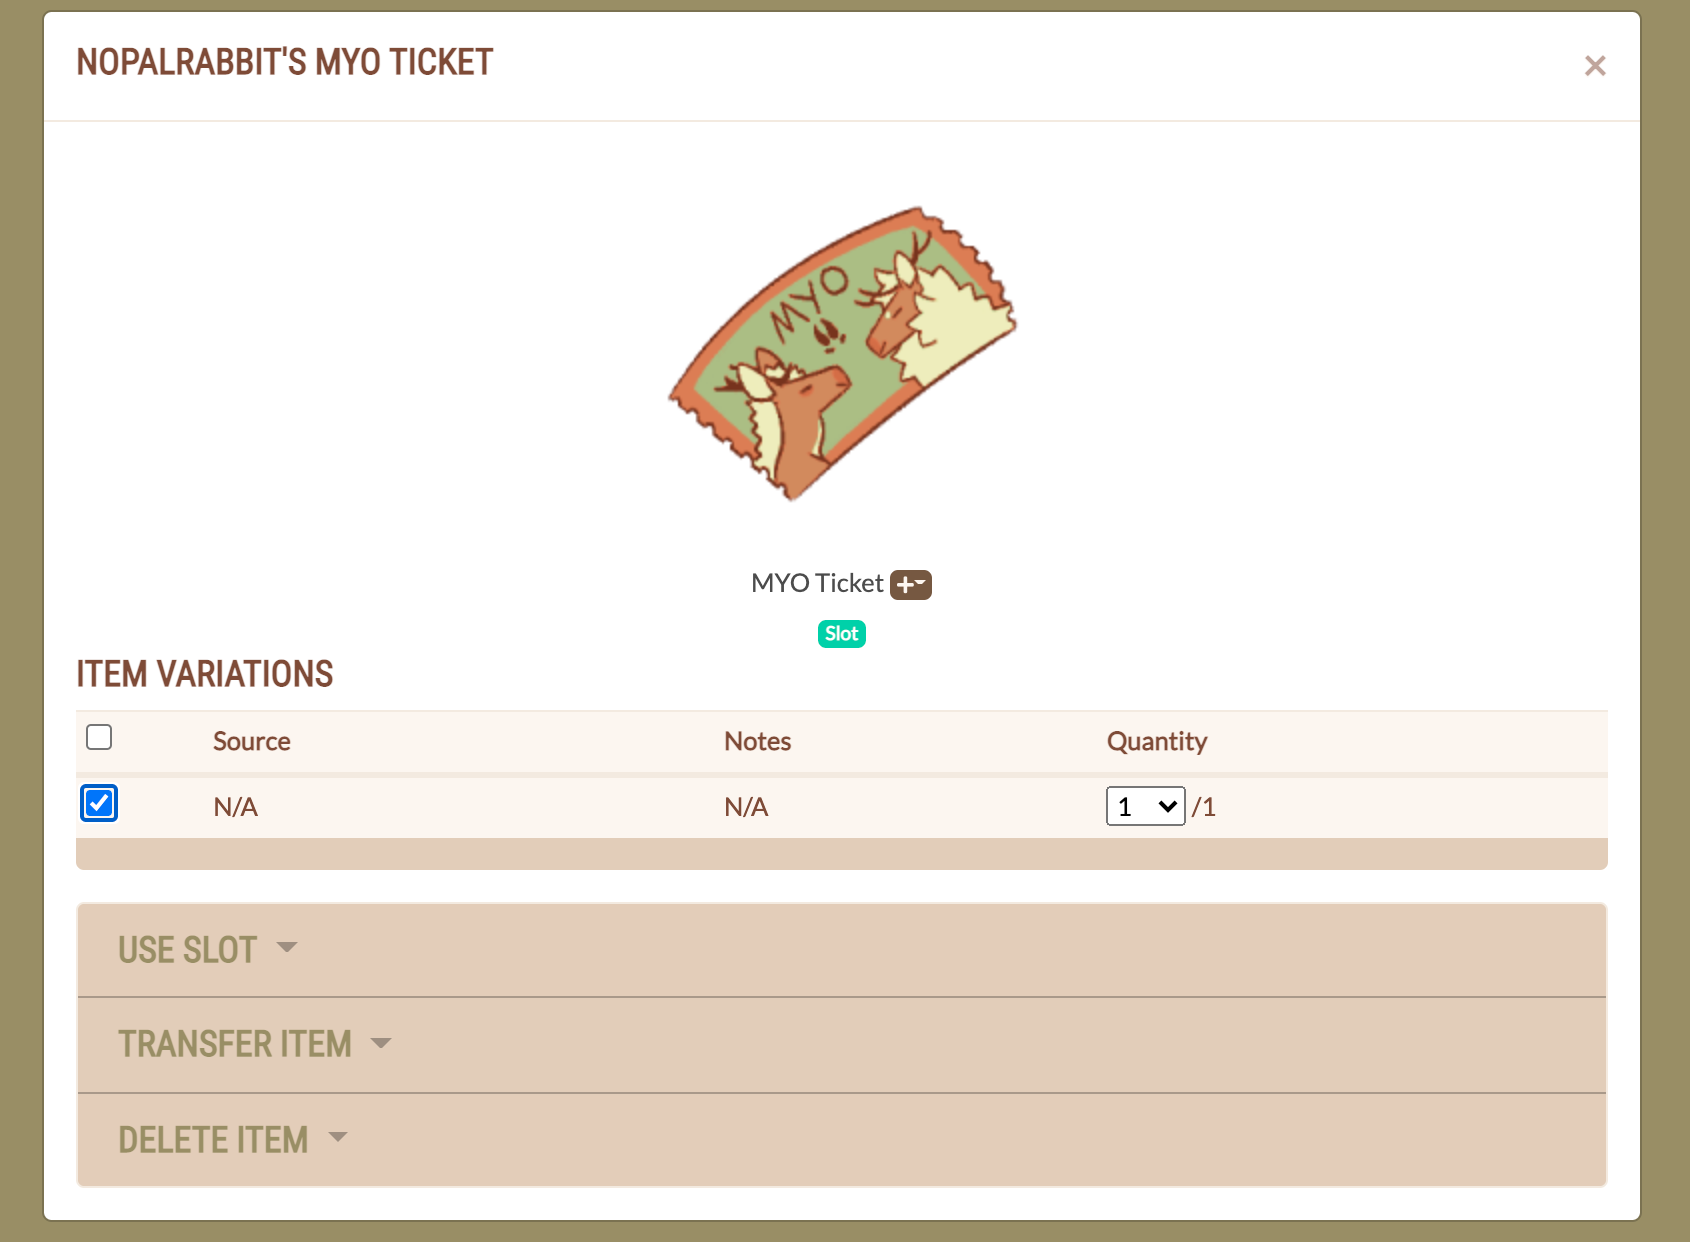
Select the check box and made sure quantitiy is set to 1
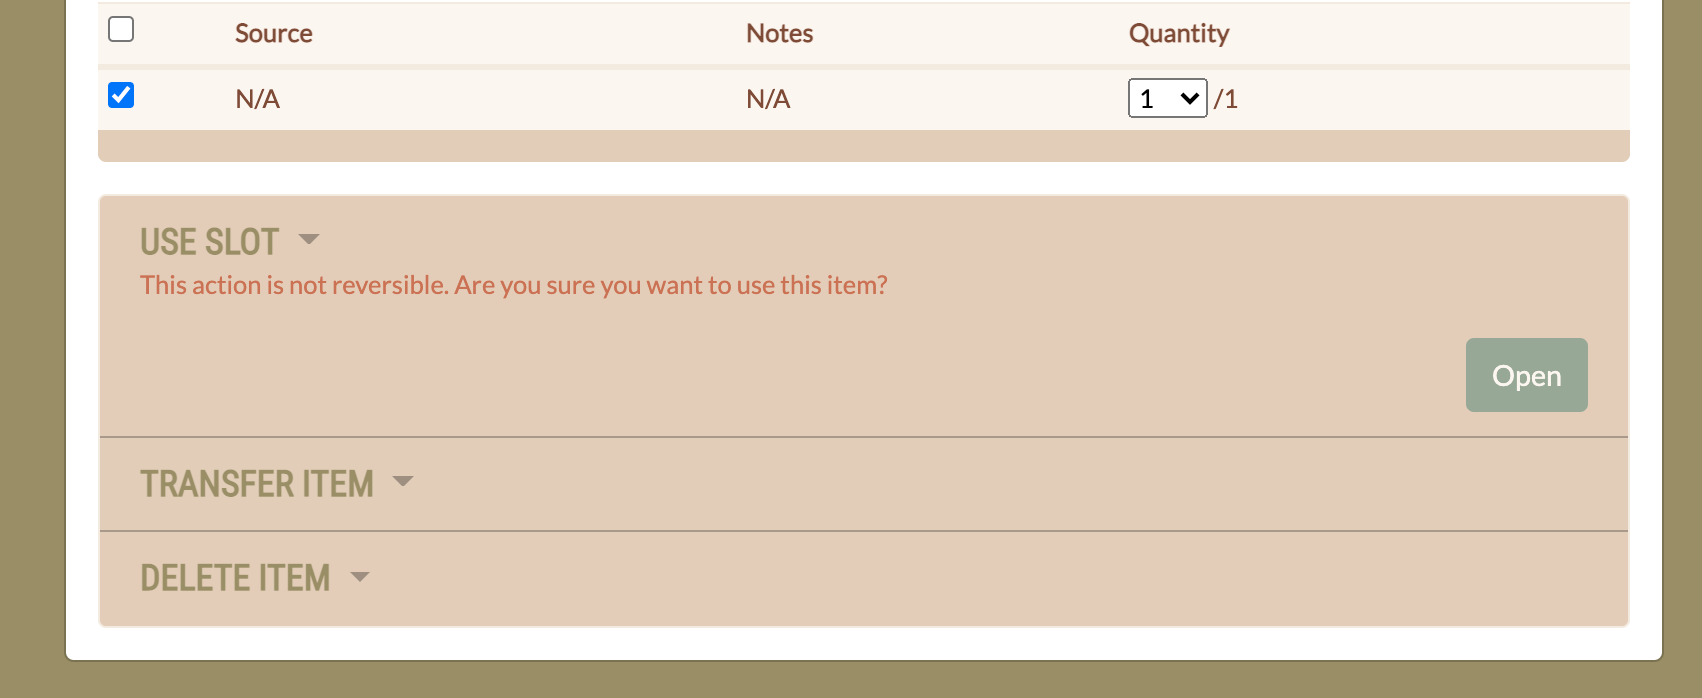
Select "Use Slot" And then hit the "Open" button
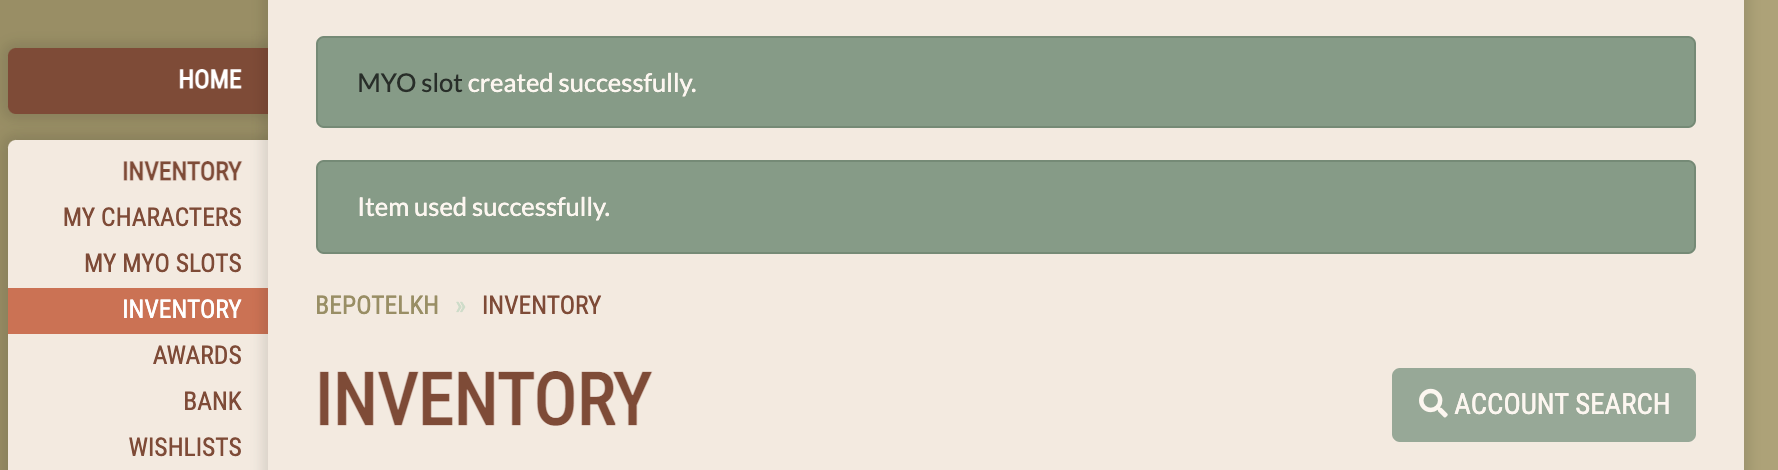
Once you hit open the MYO slot will be created. It will now show up in your "My MYO Slots" tab and also in the MYO Slot masterlist.
Finding the MYO Design Submission Page
The MYO design submission link is located on the MYO Slot itself. You may get to your MYO slots from hitting "Home" on the navigation bar and selecting "My MYO Slots".
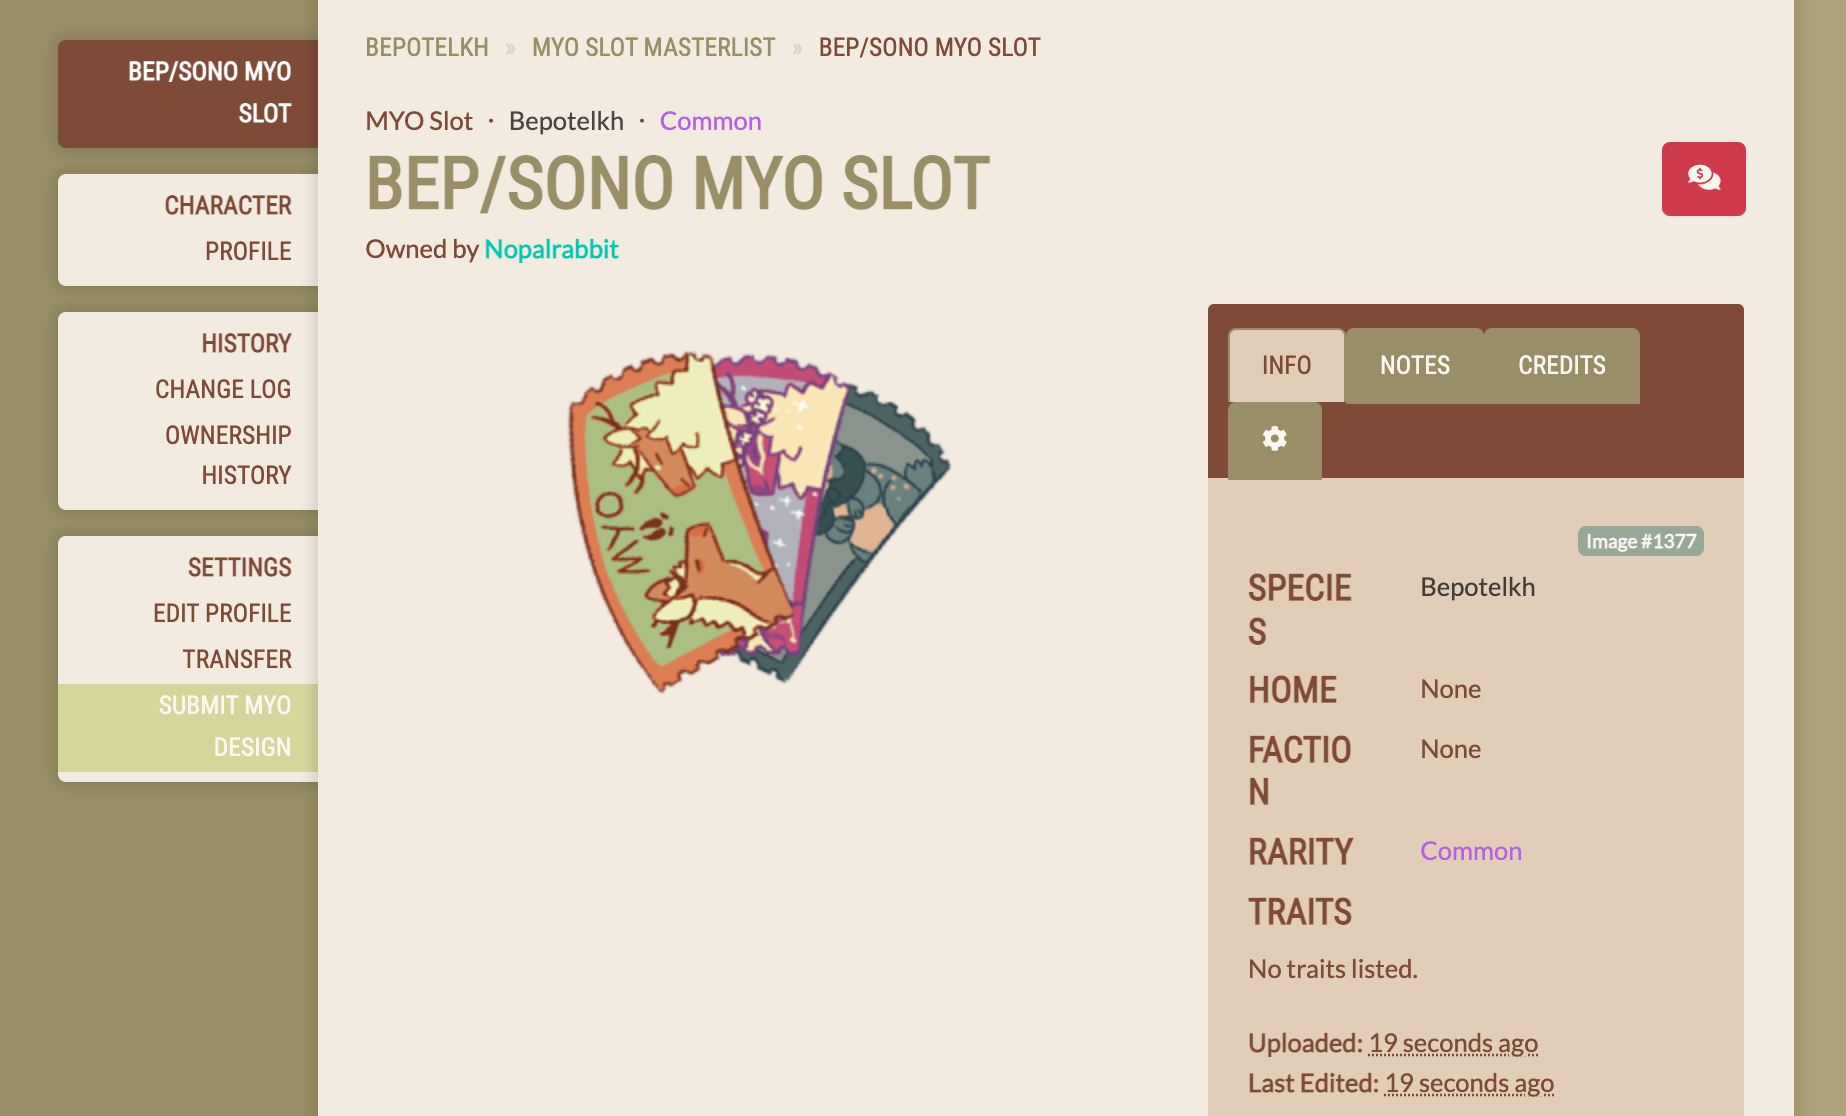
Once you've reached your myo slot page the "Submit MYO Design" button is on the very bottom of the left navigation bar (here it is highlighted in green).
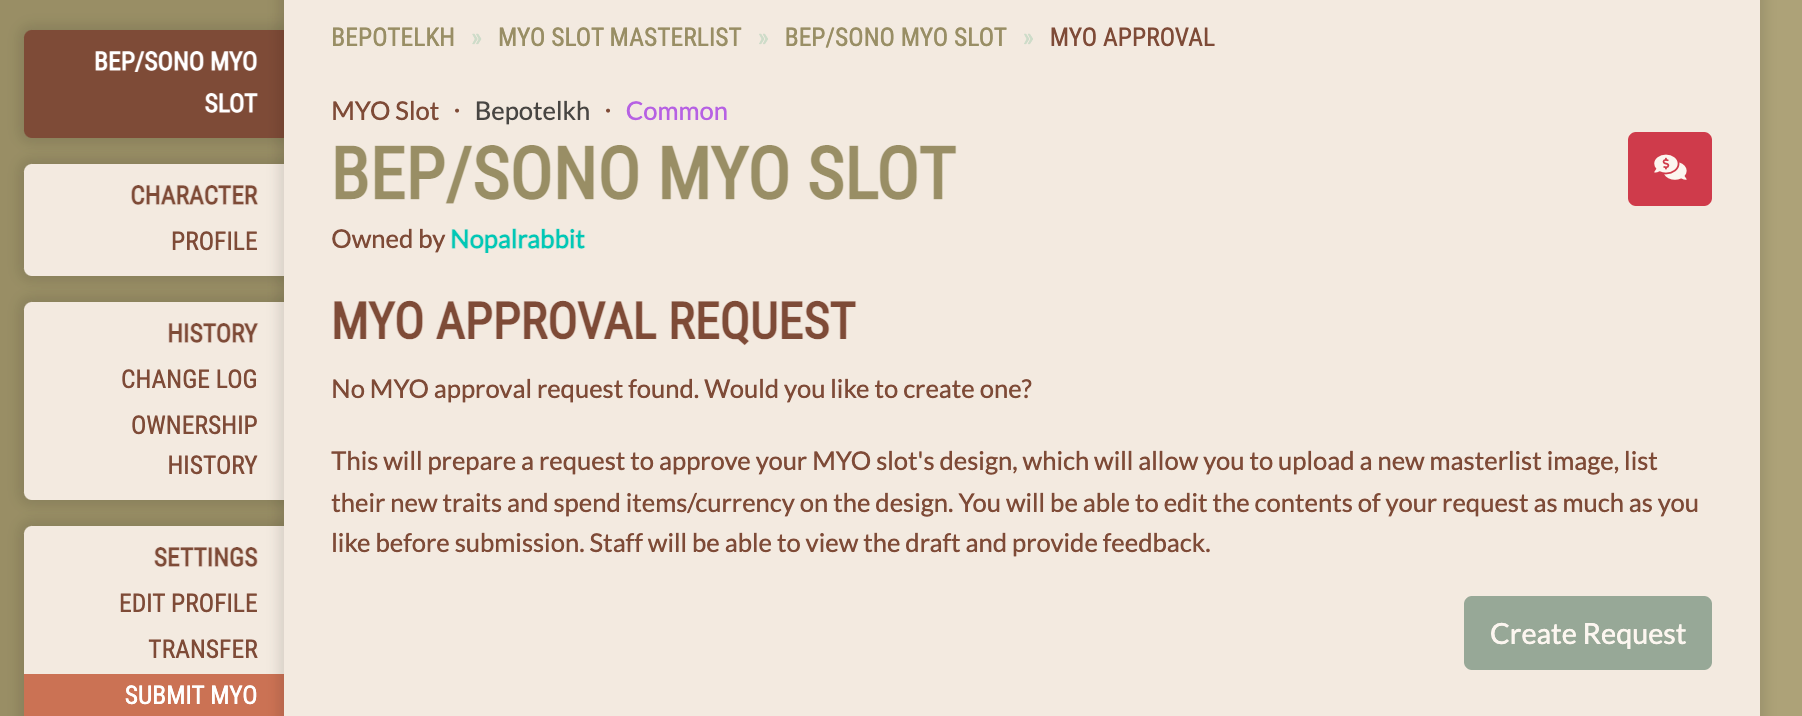
From there it will take you to the MTO Approval Request form. Select "Create Request"
Status Tab
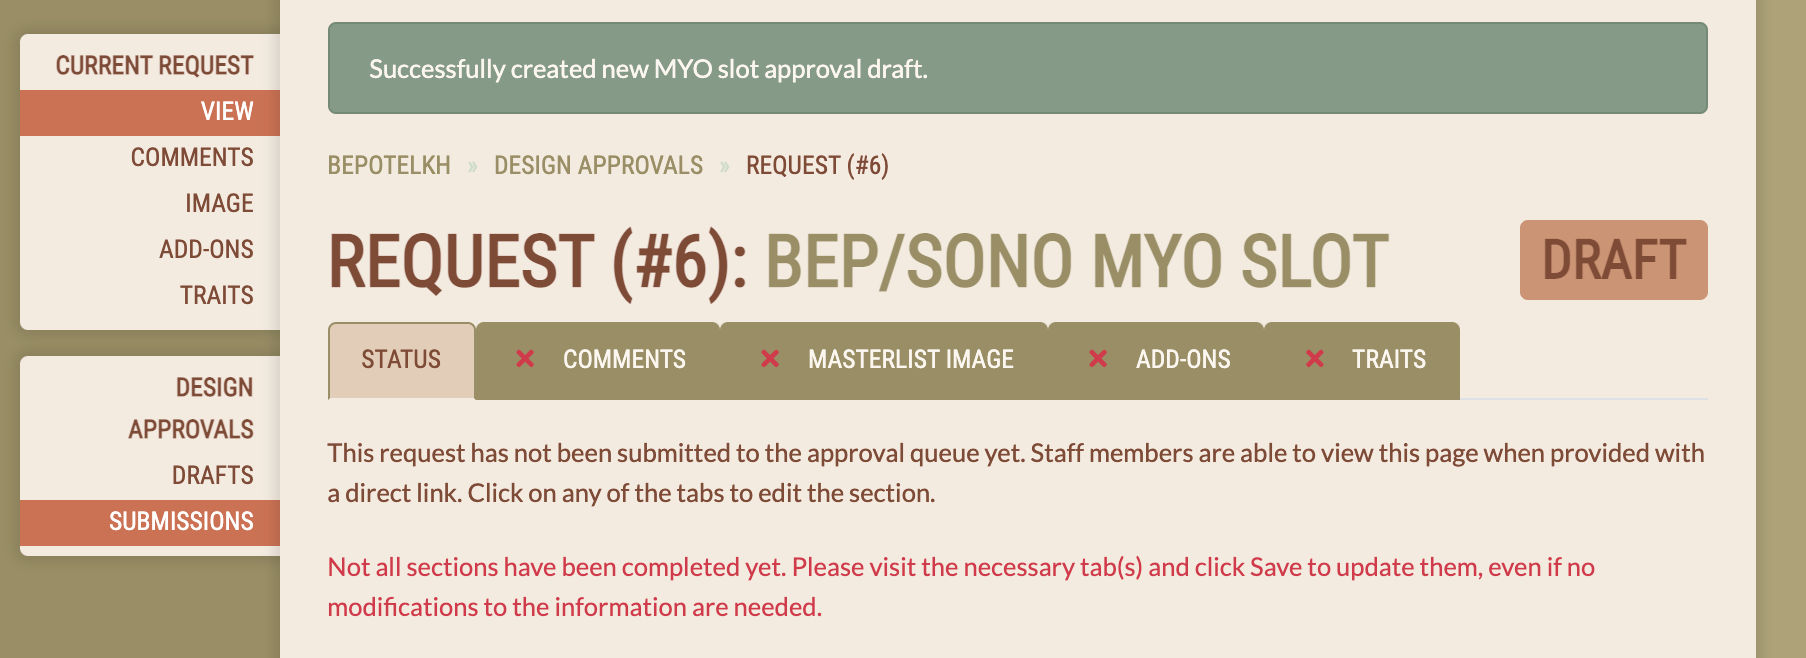
The first page you will see is the Status Tab this will let help you keep track of your progress. The red Xs indicate which parts of the submission haven't been filled out yet.
Comments Tab
The comments tab is for telling the mods what modifications you have made to your MYO slot
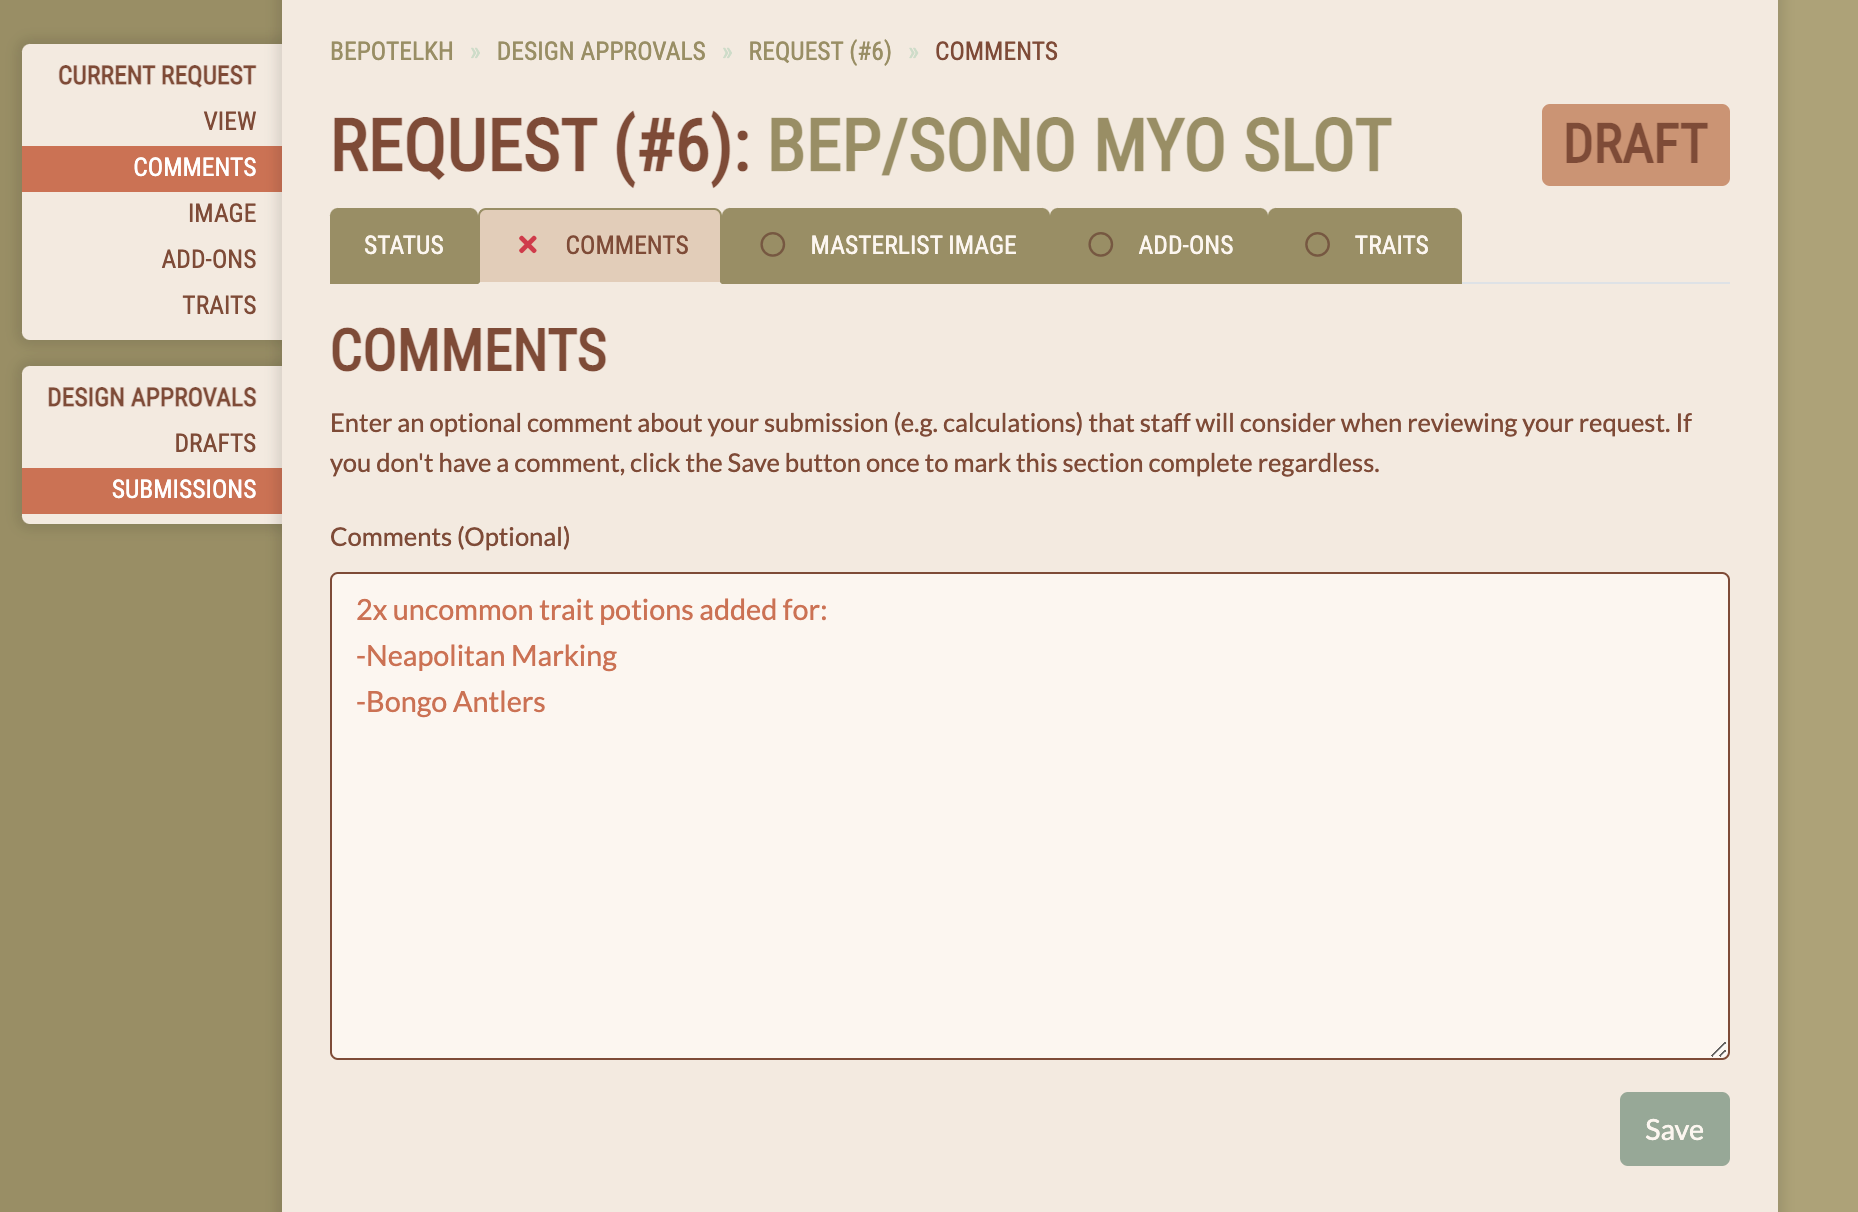
In this example the character has two uncommon traits. These trait potions will be added on with the "Add-ons" tab but for now you must list what potions you are using and what traits you are using them for. Once you've written your comments hit "Save"
Masterlist Image Tab
The Masterlist image tab is for uploading your MYO's masterlist art. Please keep your files under 1800x1800 pixels or the site will reject the file. Double refs are allowed but not necessary. It is encouraged to watermark your artwork, but please make sure the character is still visible! If the artwork is too obscured a mod may reject your submission. The image should not have any background- a transparent PNG is ideal.
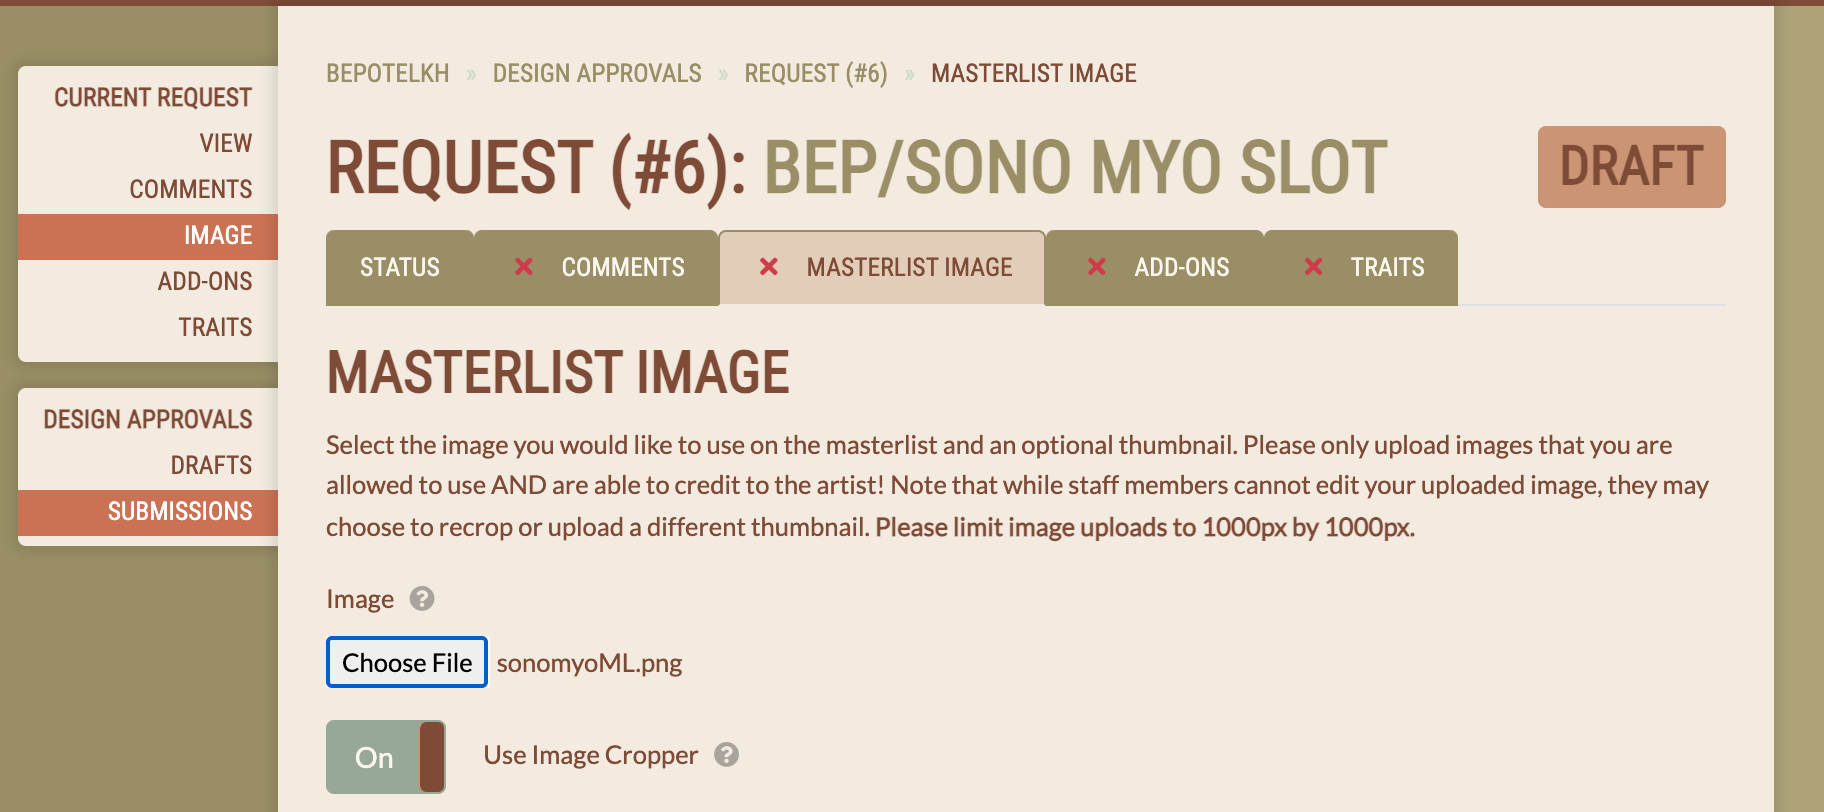
Select the "Choose File" button and upload your file. Make sure the "Use Image Cropper" toggle is ON.
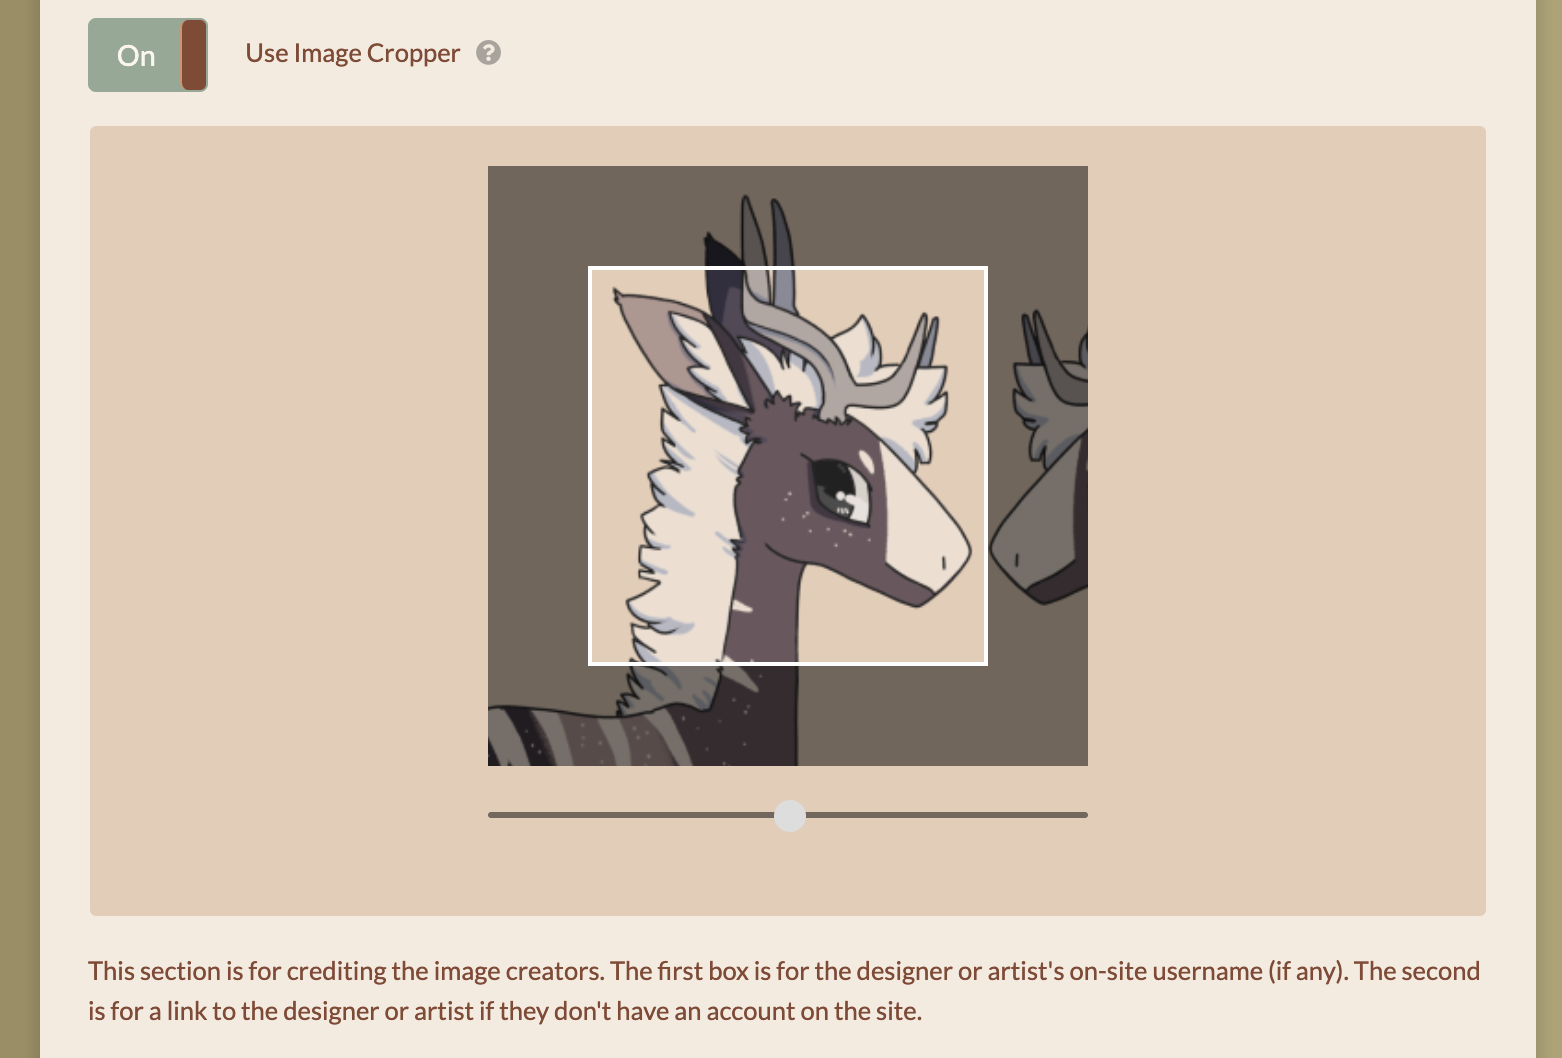
use the image cropper to crop your in close to your character's face. Look at the masterlist for examples if necessary.
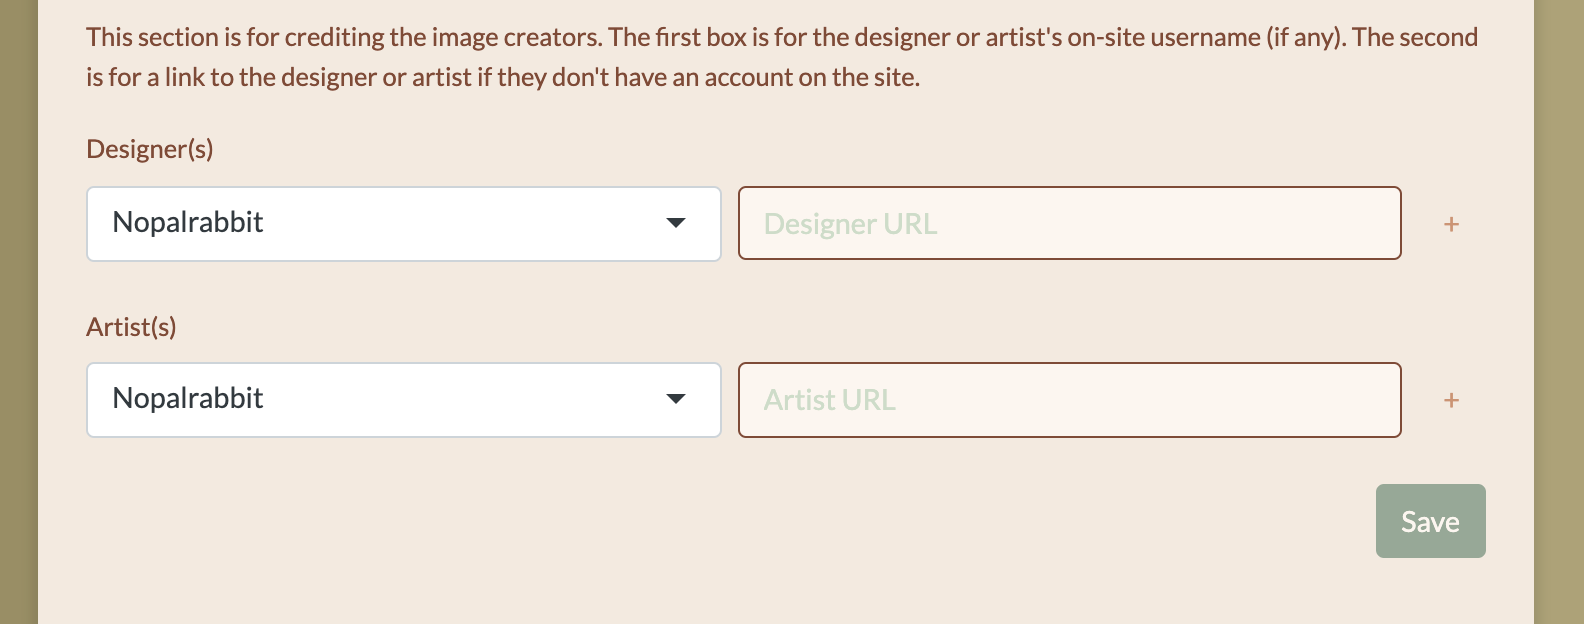
Next credit the Designer and Artist If the designer or artist is not on Bepotelkh paste their website URL into the right hand boxes. If there is more than one Designer or Artist you may hit the "+" button to add more boxes. Hit "Save" when you've filled out the form.
Add-Ons Tab
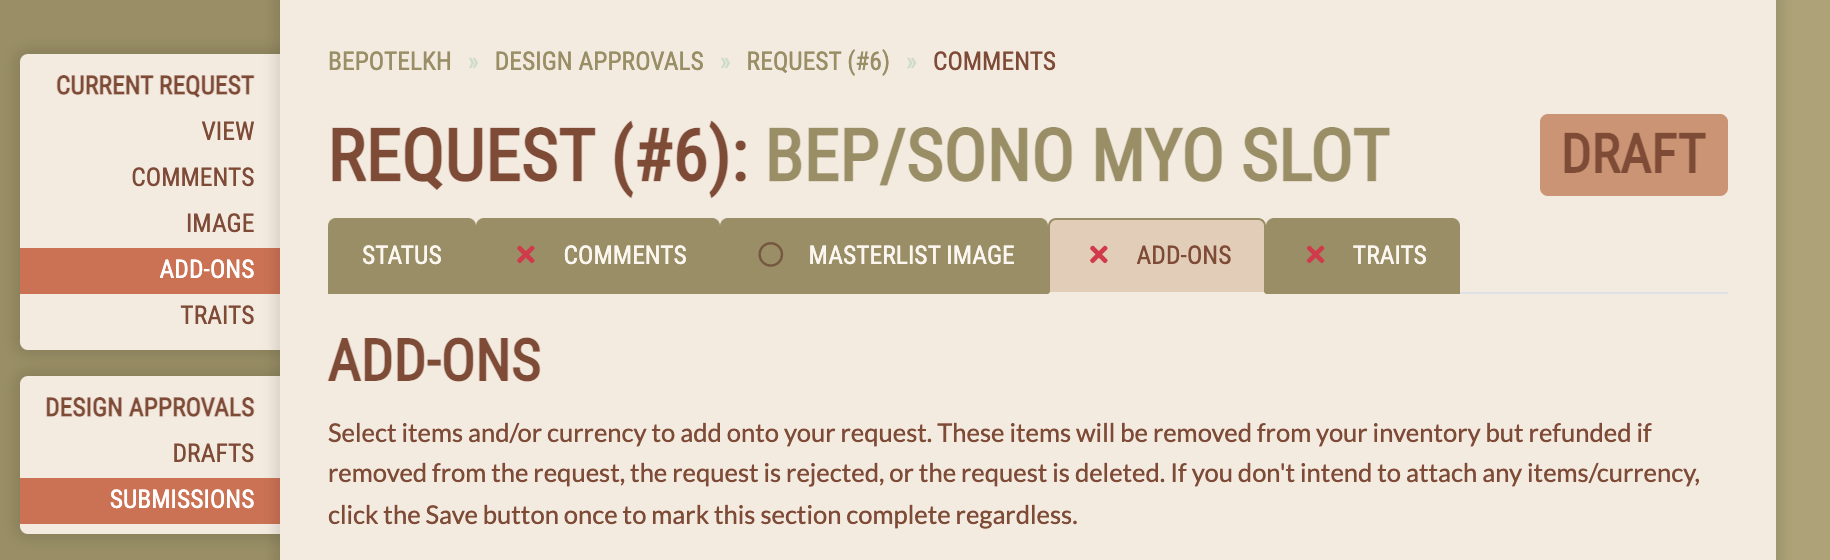
The Add-Ons tab is for attaching trait potions to your character. These items will be removed from your inventory once you submit your request but they will be refunded if your request is rejected or deleted, or if you remove them yourself. Even if you don't add on any trait potions you must go into the "Add-Ons" tab and hit save to confirm your submission.
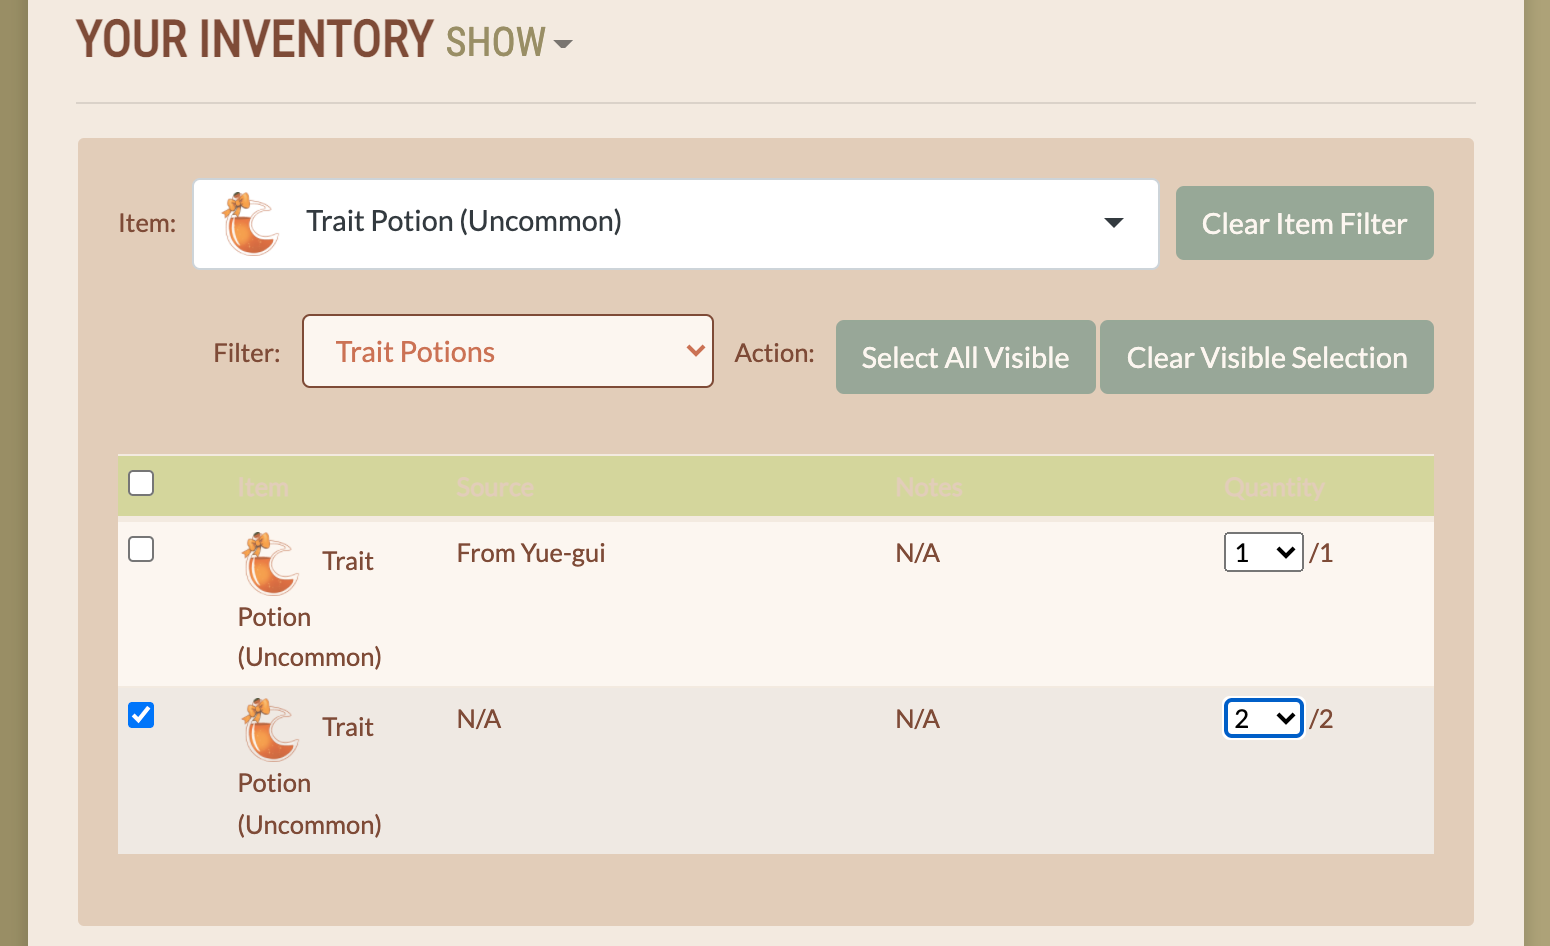
Scroll down to "Your Inventory" and use the filter and search fuction to find the items you would like to Attach to your MYO submission. Select the check box next to the item and make sure the quantity is correct. When done hit Save.
Traits Tab
The Traits Tab is where you enter your character's traits.

The species will already be filled out according to your MYO ticket.
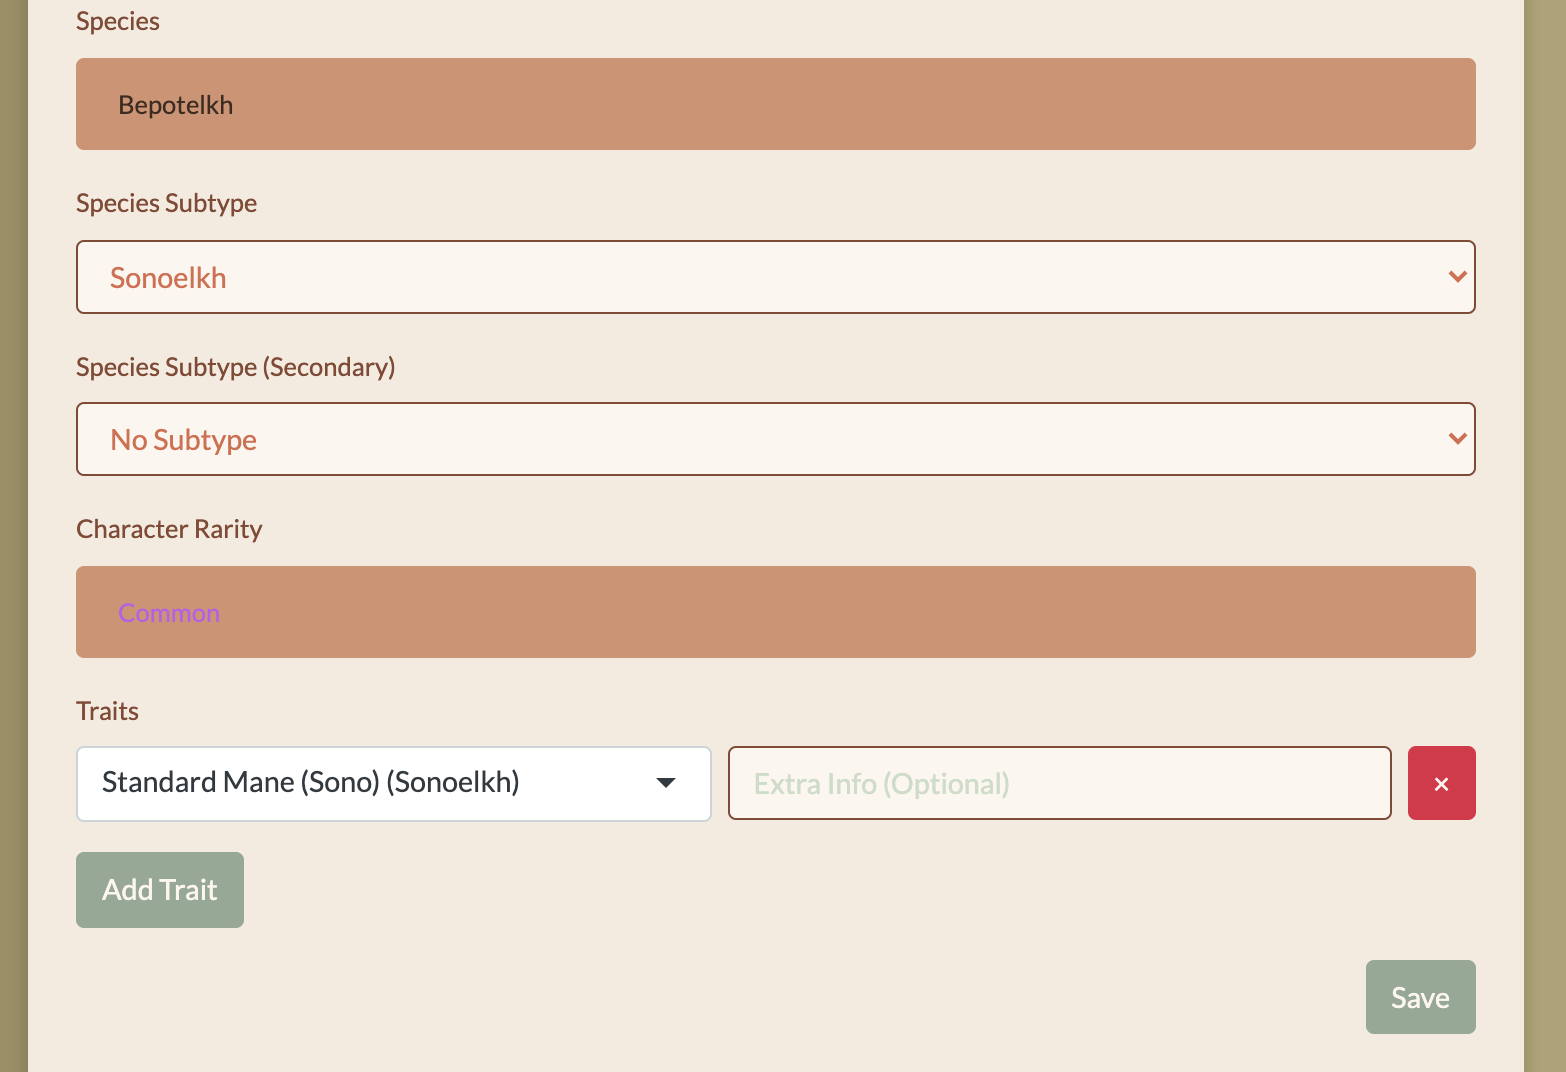
Select your character's subtype. If they are a hybrid, add their secondary subtype as well. Character Rarity will be locked, even if you add on a higher rarity trait potion. A mod will adjust your character's rarity accordingly when approving your design.
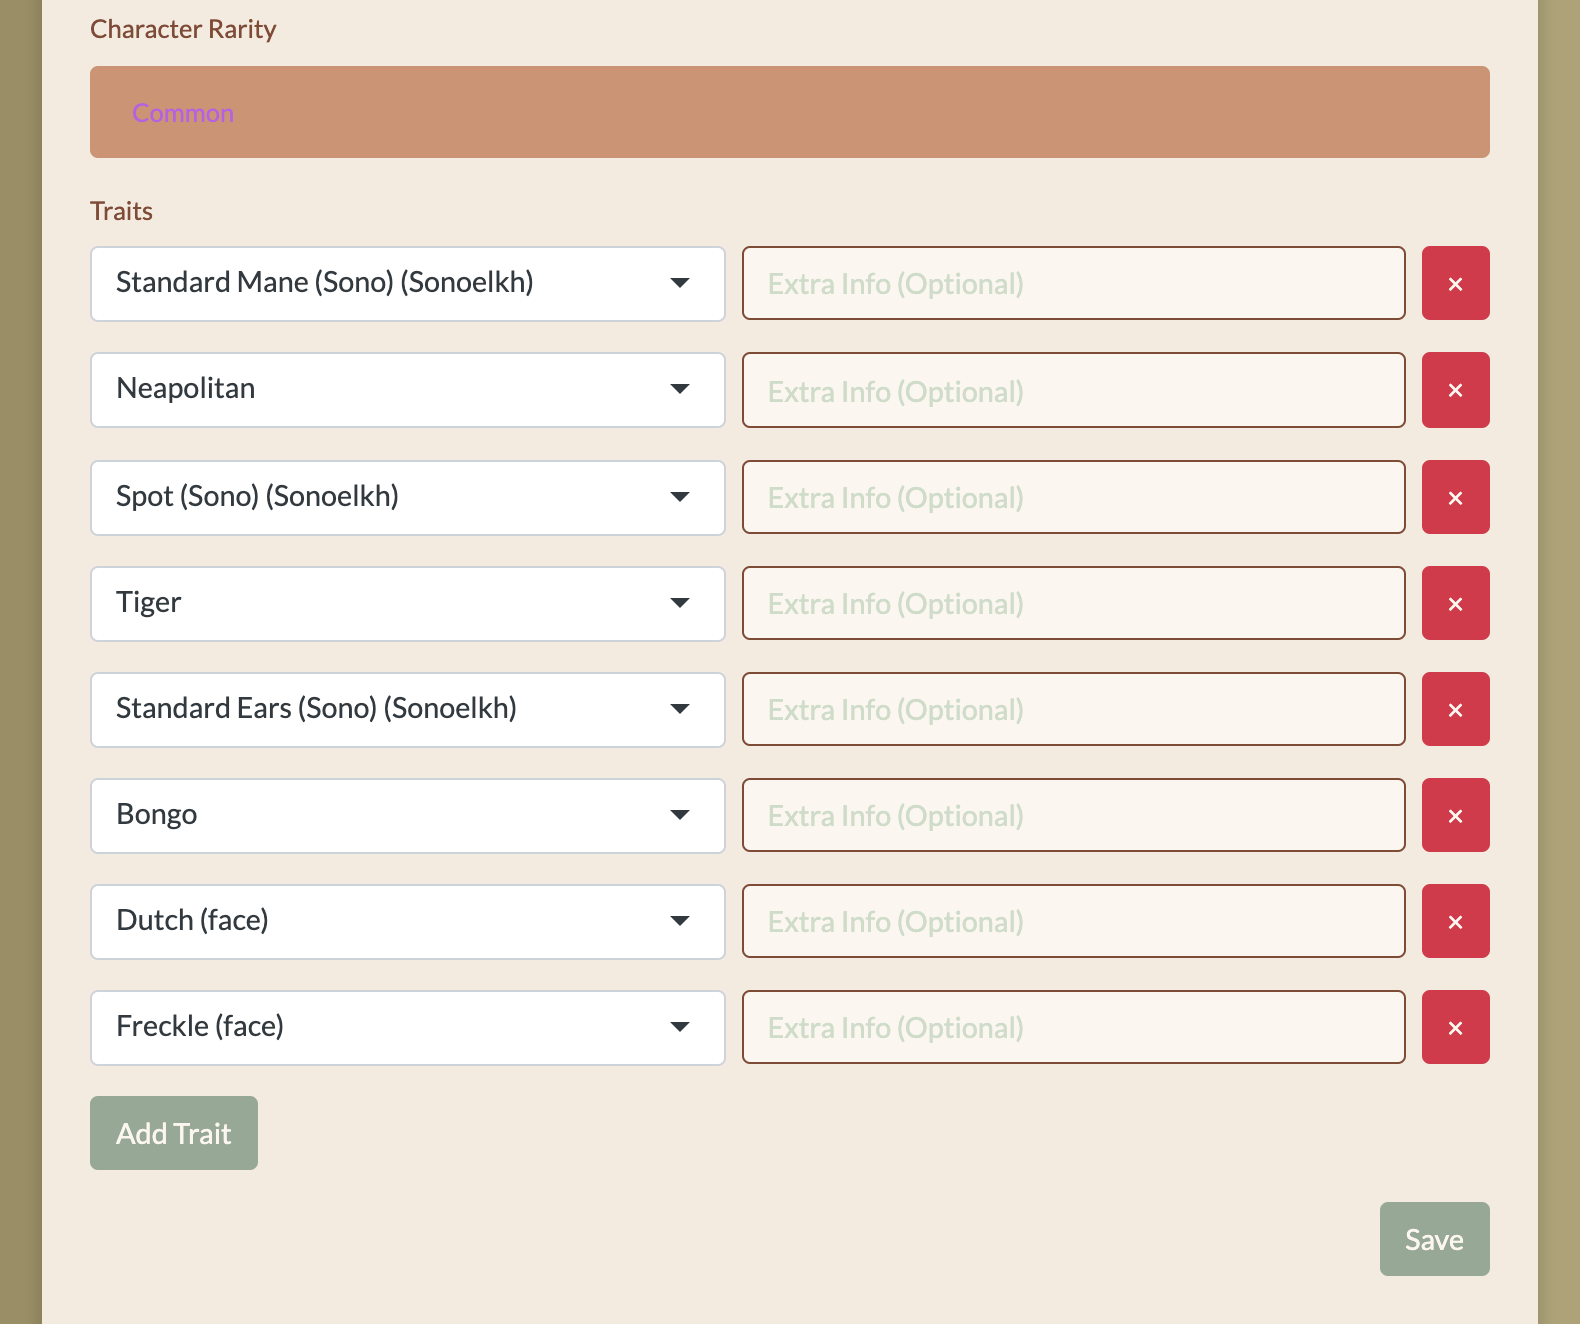
Add your charcters traits with the drop down menu. You can type in the box to quickly find the trait you are looking for. Please be aware that there are some traits that have the same name for Beps and Sonos, The sono version of those traits will say (Sono)(Sonoelkh) on them. Please make sure you are selecting the correct trait. If any of the traits are wrong the mods may reject your request and ask you to fix them.
NOTE: If you are uploading an Aitielkh or Sono Aitielkh please use the "Extra Info" box to list what flowers and gems are on their flower crowns and what the name of their constellation is.
When you are finished filling out the traits hit "Save".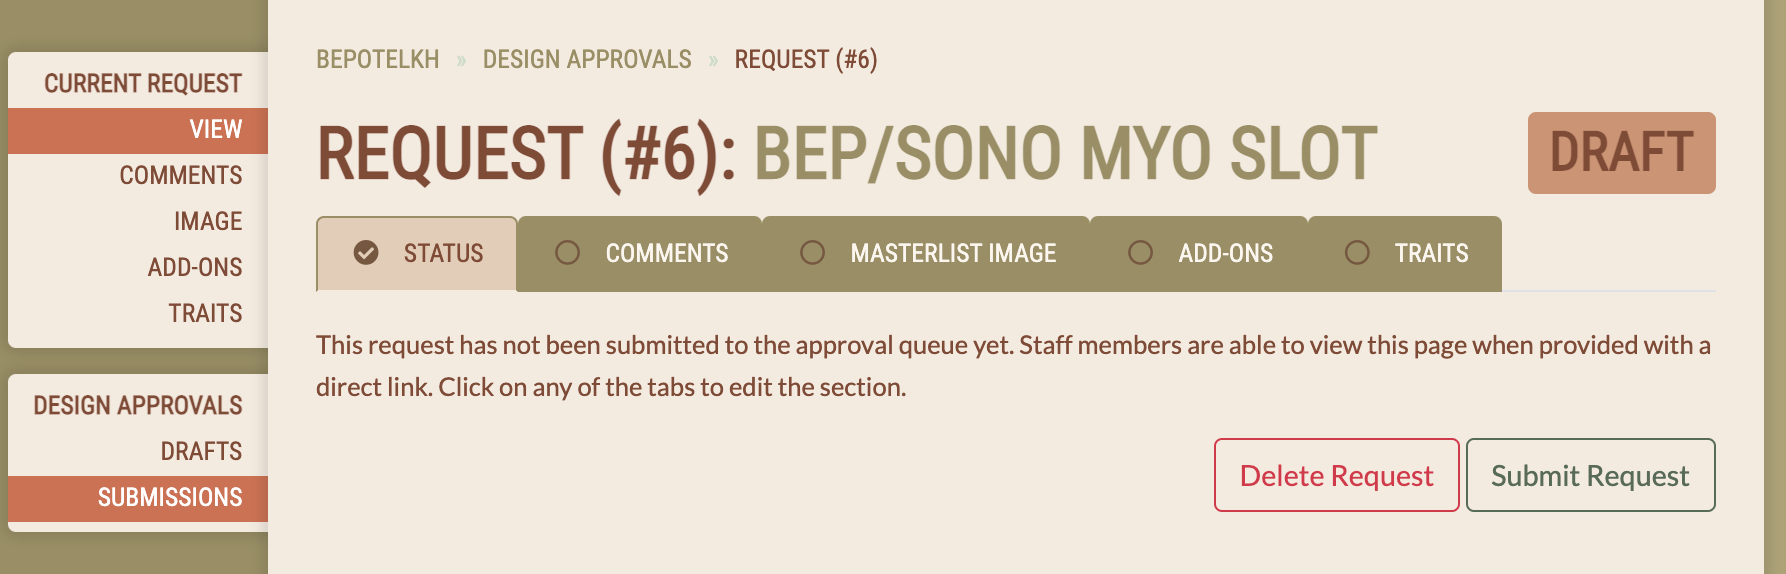
At this point your MYO Design Submission Request should be completely filled out. Make sure that no red "X"s are remaining and hit the "Submit Request" Button.
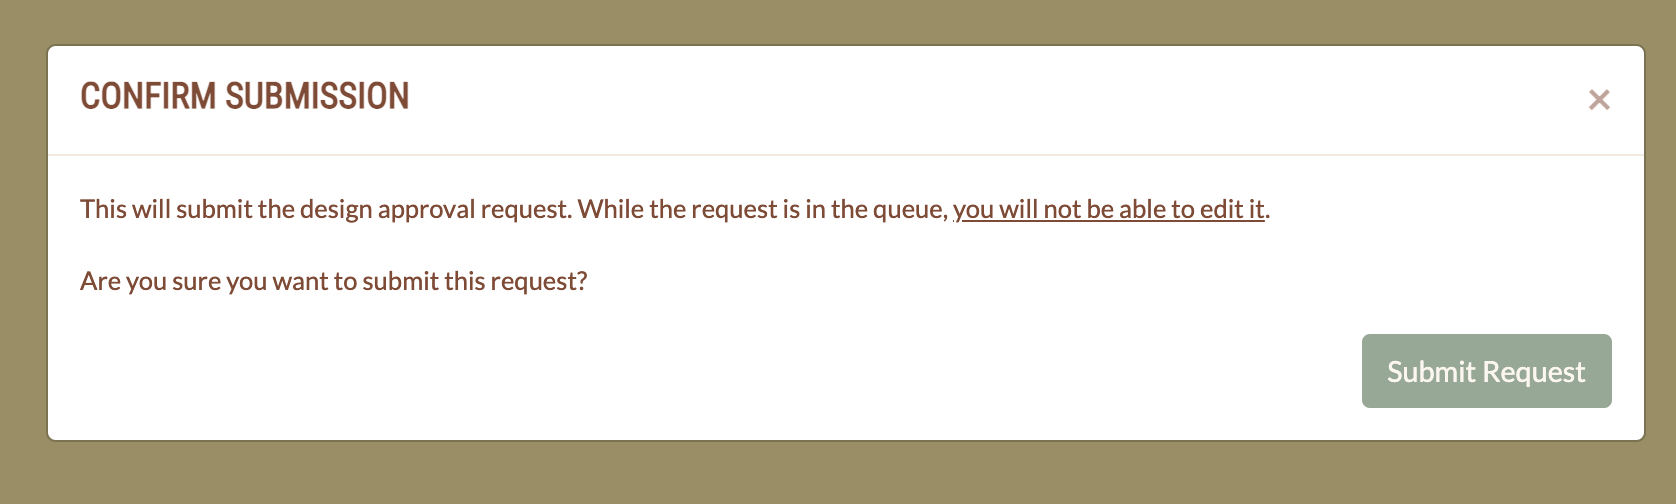
There will be a "Confirm Submission" pop up after you hit the submit request button. You may not edit your design after submitting it so please make sure it is accurate. (If you need to cancel your MYO submission you may do so by goig to the "Activities" button on the main navigation and selecting "Design Approvals")
Make sure to hit "Sumbit Request" a final time to confirm your design submission.